The D-Day Commando Assault on the Gun Battery at Ouistreham
The following details the actions of No. 4 Commando on D-Day as extracted from the Commando War Diary for the 6th of June 1944.
Summary of Event and Information (War Diary)
A fiercely opposed beach landing during which No. 4 Commando took over the role, previously allotted to an earlier wave of Infantry which had been pinned down by enemy fire: the storming of heavy fortifications at OUISTREHAM; street fighting through areas infested with snipers; a forced fighting march with men carrying up to one-hundred and forty pounds and finally, after a further eight hours, the taking over of a defensive position which was to withstand heavy mortaring, repeated enemy attacks, shelling and dive bombing - these were the highlights of the first days of No. 4 Commando after their D-Day landing in FRANCE.
Heavily laden commandos on Sword Beach. (IWM)
The Landing
The Commando, five hundred strong, landed in two waves from HMS Princess Astridand the SS Maid of Orleans and touched down on RED QUEEN Beach, a mile to the WEST of OUISTREHAM, at LA BECHE. The original intention of the British landings had been for 8 Brigade, which consisted of the Suffolks, East Yorks and South Lancs to take the beach and form a beach head through which No. 4 Commando was to pass and take the Gun Battery at OUISTREHAM. The County Regiments, landing at 0750 hrs, found intense opposition from the strongpoint on RED QUEEN Beach and were pinned down by concentrated machine gun and mortar fire at the water’s edge, some being in 2 ft of water when No. 4 Commando’s first wave of LCAs went in at 0820 hrs.
Mortar bombs were falling in and around the LCAs and as the Commando landed there were 40 casualties, including the Commanding Officer, Lt. Col. R.W.P. Dawson, who was wounded in the leg. Rapidly forming up under concentrated fire, No. 4 Commando fought their way from the beach to the forming up area, putting out of action several of the enemy strong positions and enabling Units of 8 Brigade to pass through.
‘C’ Troop, under command of Capt. D.C.W. Style MC, (later seriously wounded), pushed past the East Yorks, who were lying at the water’s edge, and successfully engaged about a dozen of the enemy in slit trenches and a few more in pillboxes, afterwards moving up in orderly fashion to the Assembly Area.
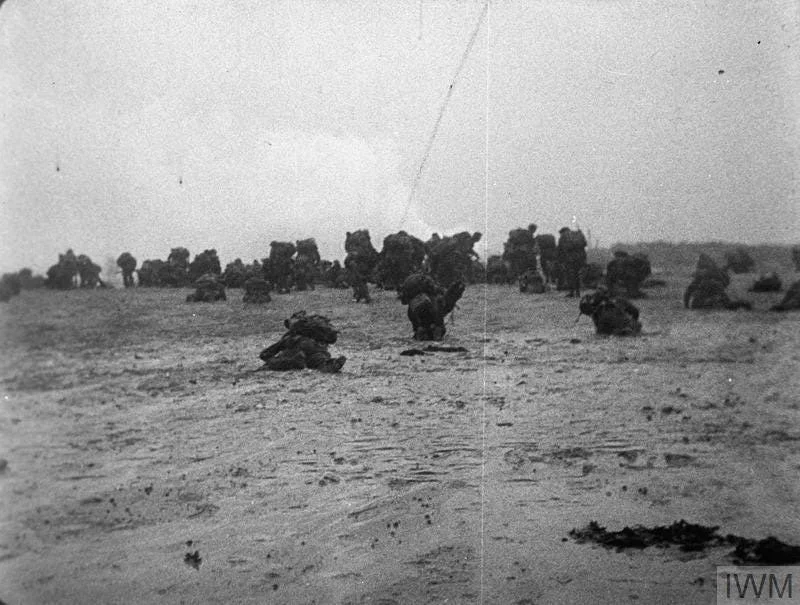
The commandos clear the beach. (IWM)
Lt. Col. Dawson moved forward to contact 2nd Bn East Yorks Regt and was wounded in the head. He was, however, sufficiently able to order the Commando to move off from the Assembly Area, relinquishing command of the Commando when the Second in Command passed him, saying that he intended, if it was possible to follow on behind. The Second in Command ordered the medical orderlies to give him some morphine. Lt. Col. Dawson was again seen on the road after the Battery had been taken, he was then sent by the Medical Officer to the BDS. On the evening of D plus 1 (7 Jun 44) Lt. Col. Dawson arrived in a Jeep at Commando defence positions at HAUGER and stayed there until D plus 3 when he was ordered to be evacuated by the ADMS.
The Check Point
‘C’ Troop waited for the remainder of the Commando to position itself and then moved on behind Nos 1 and 8 (Fighting French) Troops along the OUISTREHAM road to the Check Point, being harassed by snipers and machine gunners in houses. Tanks greatly helped in clearing this opposition. From the Check Point, ‘C’ Troop again took the lead and established a route to the Battery - the Commandos main task. Invaluable assistance was given to the leading Troop by a French Gendarme member of the Underground Movement who helped the Commando to by-pass other enemy strongpoints and reach their objective without unnecessary delay. Great help was also afforded the Unit by 4 Centaurs which gave cover from snipers. On arrival at major tank obstacles covering the inland side of the Battery strongpoint, and still under enemy fire, a search was made and two suitable bridges made. Here, a machine gun post and mortar position were silenced by PIAT fire.
Together with ‘A’ Troop, under command of Capt. A.M. Thorburn, ‘C’ Troop then gave covering fire to enable ‘D’ Troop, commanded by Major P. Porteous VC, to pass through ‘E’ Troop, commanded by Capt. H. Burt, and ‘F’ Troop, commanded by Capt. L.N. Coulson, were then covered across. Continued sniping end mortar fire inflicted further casualties.
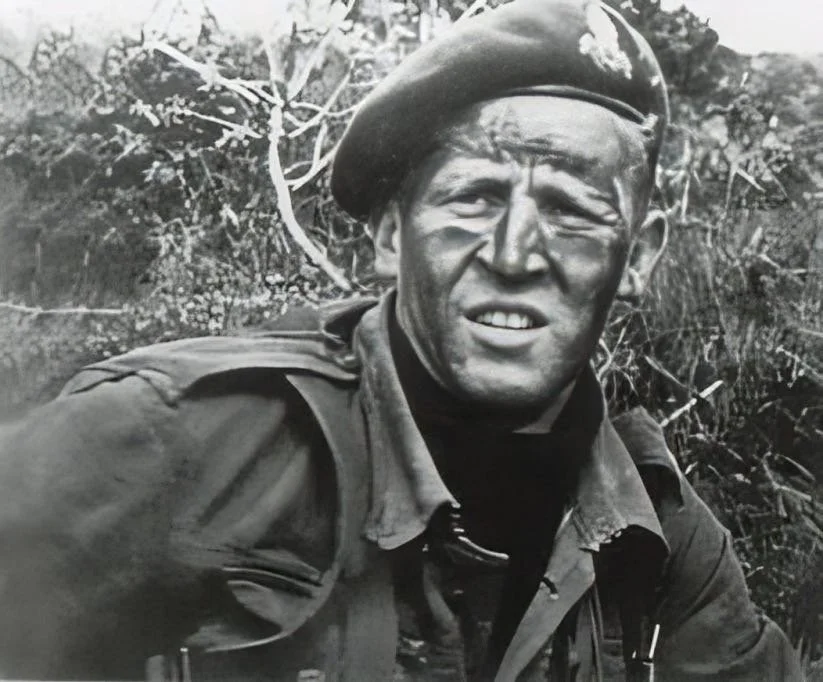
Major Pat Porteous VC who was awarded the Victoria Cross on the Dieppe Raid. (IWM)
The heavy rucksacks carried by the Commando had been dumped under HQ and the Mortar Section. Under orders by the Unit wireless, mortar fire was brought to bear on the Flak Tower at the EAST of the Gun Battery and covering the whole area. The French Detachment, commanded by Capt. P. Kieffer, who was later evacuated severely wounded, over-ran the Casino area in the WEST of the strongpoint.

Captain Philippe Kieffer MC. (IWM)

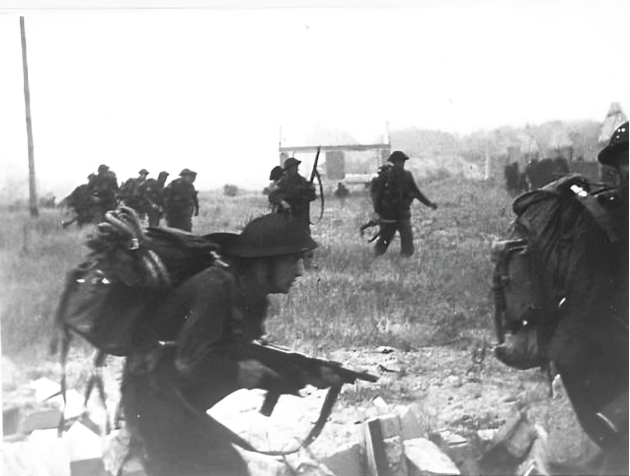
The advance to contact. (© MC McDougall)
The Assault
Then the assault went in on the Battery, all Troops moving according to plan. Heavy casualties were inflicted on the enemy who put up a very stiff resistance from their strong fortifications and cunningly camouflaged block houses commanding excellent fields of fire. The concrete emplacements had withstood severe Naval bombardment exceedingly well, and although outnumbered, the Germans were in excellent defensive positions and had advantages of emplacements which had successfully withstood a terrific pounding from the sea and air. Several prisoners were taken when the Germans surrendered after their position had become untenable. Casualties on both sides had been high and after the engagement medical orderlies from opposing sides worked side by side succouring the wounded.
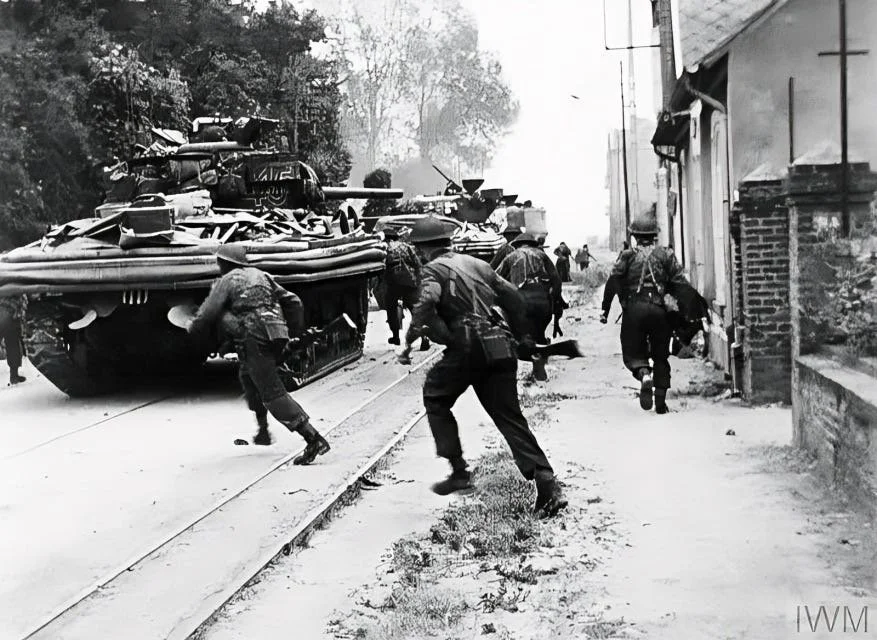
The commandos launch the assault. (IWM)
One of the outstanding features of the defence of the Battery by the enemy was the careful sighting of their positions, and from the Commando’s viewpoint, the difficulty of finding points of enemy fire power during the mopping up stages, so well had the emplacements been prepared. But at least one point of Hitler’s Western Wall had proved vulnerable under determined enough attack.
The March
No. 4 Commando then withdrew to the area where the rucksacks had been left and prepared for a strenuous and back breaking 9 miles march under constant sniping and mortar fire to HAUGER across the CAEN Canal and the River Orne. A stick of bombs dropped by a German plane caused no casualties, but mortar fire and sniping occurred at the bridges after the majority of the Unit had crossed them. It was here that Lieut. P.M. Mercer Wilson - the only casualty of the crossing of the bridges - was killed during a minor action against the enemy.
Continuing unmolested the Unit reached the CROSSROADS (121755) on the RANVILLE - SALLENELLES RD, where Brigadier, The Lord Lovat DSO, MC, Commanding No. 1 Special Service Brigade was contacted.
Brigadier, The Lord Lovat DSO MC. (IWM)
The Brigadier ordered the Unit to move forward and take up defensive positions in and around the village of HAUGER on the extreme left flank of the Allied landings and in direct contact with the enemy. Headquarters was established at a small farm in the village at 2130 hrs and troops were allotted their defensive areas and carried out digging slit trenches and weapon pits, a task which took until the early hours of D plus 1 (7 Jun 44), the area having been reconnoitred by Major P. Porteous VC. It was to be four days and nights before the Unit had the opportunity to rest.
Sources: No. 4 Commando War Diary
Images: IWM; Swiftly They Struck MC McDougall